Indoor Turf for Basement: Moisture, Safety and Setup
Indoor turf for basement projects: match the surface to your use, check moisture, confirm impact safety and install it without trapping damp.
You've cleared the basement, moved the storage bins, and started picturing a green training lane, a putting surface, or somewhere softer for the kids to play. Indoor turf can make that space feel purposeful, but covering the concrete is the last decision, not the first. The slab's moisture condition and the activity's safety requirements decide whether the installation should proceed.
A good-looking sample won't tell you what's happening beneath the floor. Before choosing indoor turf for basement recreation, work out what the room needs to do, whether the concrete can support the proposed flooring assembly, and what documentation proves the surface is suitable.
Indoor Turf Options by Basement Use
A finished lower level might serve as a gym in the morning, a playroom after school, and a dog area during bad weather. Those uses don't ask the same things of a floor. A firm putting surface, for example, isn't a substitute for impact-rated play surfacing.
Basement conversions are an established remodeling category: CityScene's reporting on finished basements cites U.S. Census Bureau findings that approximately 9% of U.S. homes had a finished basement in 2021. Turning existing lower-level space into an activity room makes practical sense, provided the flooring matches the activity rather than just the decorating scheme.
Basement turf requirements by use
| Basement use | Impact protection needed | Moisture control level | Base or pad to request | Documents to request |
|---|---|---|---|---|
| Home gym or lifting | Activity-specific cushioning; separate protection for dropped weights | High, verify slab before installation | Sports shock pad over a verified dry slab; dedicated lifting surface where needed | Current impact test for the full assembly |
| Children's play | High where falls from equipment are possible | High, verify slab and moisture-control details | Tested shock pad with secured seams matching the tested build | Critical-height rating under ASTM F1292 |
| Dog or pet area | Low for ordinary floor-level activity | Very high, address urine and cleaning water | Perforated, antimicrobial backing over a designed drainage or collection system | Drainage and antimicrobial specifications |
| Putting or golf practice | Low for putting; separate hitting mat for full swings | Moderate, with slab verification | Firm, flat base | Base flatness check and product warranty |
| Media or family room | Comfort cushioning, not assumed fall protection | Moderate to high | Thin compatible pad and specified vapor-control assembly | Product warranty and base specification |
Choose performance before appearance
Higher fall risk means stronger documentation requirements. A cushion that feels pleasant underfoot doesn't establish protection from a climbing-wall fall, and a sports pad doesn't automatically protect concrete from dropped barbells.
Liquid exposure changes the priorities, too. In a pet area, the route for contaminated water matters more than a realistic-looking blade. Perforated backing lets liquid through, but concrete beneath it doesn't make that liquid disappear.
Compare polyethylene artificial grass only after establishing the room's performance needs. Write down the basement's main use, match it to a row, and identify any secondary activity that requires a separate surface.
Check Moisture and Humidity Before Any Turf Goes Down
A musty basement shouldn't be covered with turf, even if the concrete looks clean. Moisture can remain hidden beneath backing and padding, leaving the homeowner treating surface odors while the actual problem continues underneath.
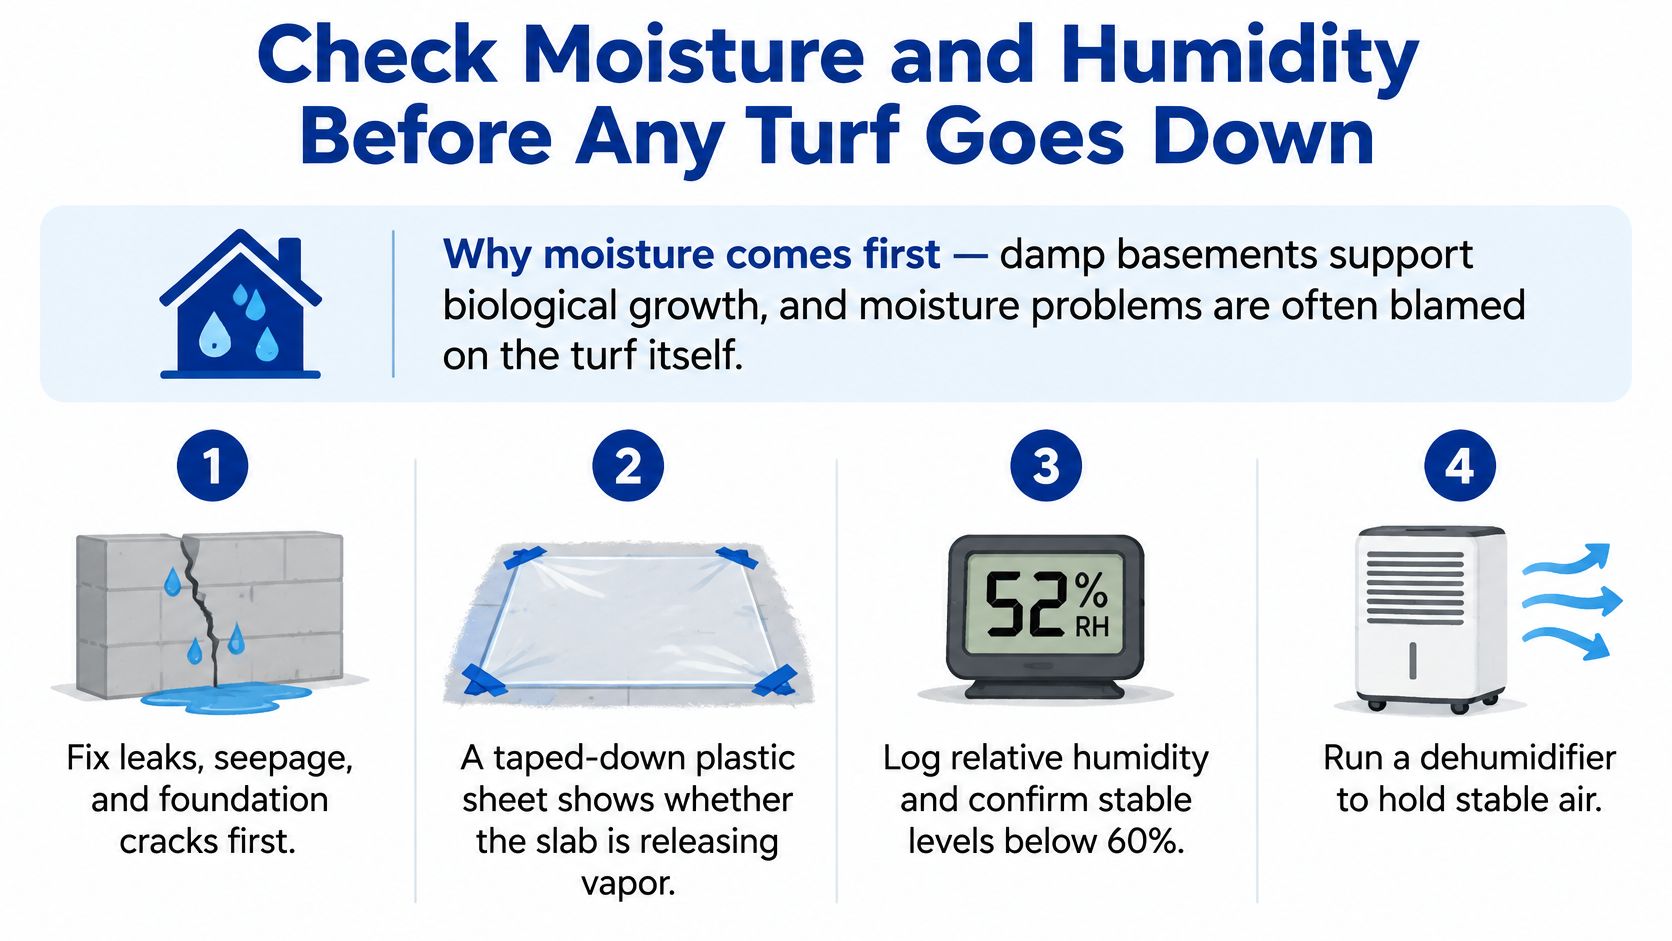
The EPA's guidance on remodeling and indoor air quality recommends correcting basement leaks, seepage, foundation moisture, and ventilation problems before converting the space, and maintaining relative humidity below 60%, ideally 30–50%. Room humidity and slab moisture are separate checks. A dehumidifier can dry the air without proving that concrete is suitable for adhesive.
Use this checklist to organize the assessment before materials arrive.
Investigate water before testing the floor
Start outside and at the foundation. Check downspout discharge, visible seepage, plumbing leaks, wall staining, and wet floor-wall joints. Repair the source rather than painting over the evidence.
Tape clear plastic tightly to bare concrete as a screening check. Condensation or darkening underneath signals a problem worth investigating, but a clear result isn't installation clearance. Have the installer perform the substrate testing required by the selected adhesive, pad, and vapor-control system.
Place a digital humidity monitor away from the dehumidifier's discharge. Record conditions through normal household use and wet weather, and arrange continuous condensate drainage where practical so a full collection bucket doesn't interrupt operation.
Specify the assembly, not a generic barrier
A loose plastic sheet isn't an interchangeable substitute for a bonded moisture-mitigation coating or a raised subfloor. Choose a compatible system based on the slab assessment, including how seams, walls, penetrations, and adhesive interfaces will be handled.
Avoid absorbent carpet-like underlays that can conceal wet material. Leave a deliberate inspection route, such as an accessible perimeter section, without weakening required edge restraint.
Stop rule: Visible dampness, unexplained condensation, or an undocumented substrate condition means the floor isn't ready to cover.
Before proceeding, confirm:
- Water sources corrected: No unresolved leaks or seepage.
- Substrate accepted: Documented results meet the selected system's requirements.
- Air conditions stable: A humidity log supports the moisture plan.
- Inspection possible: Drainage and future access are written into the installation scope.
Impact Safety for Kids and Athletic Zones
Soft-looking turf isn't automatically protective surfacing. Long blades can hide a hard concrete base just as easily as they can cover a tested shock pad. Ordinary carpet, mats, grass, and dirt shouldn't be treated as protective playground surfacing without applicable impact testing.
The U.S. Consumer Product Safety Commission's surfacing guidance identifies ASTM F1292 as the principal playground impact-attenuation framework, with laboratory drop testing producing a critical-height rating. Athletic flooring uses separate methods and specifications, including ASTM F2569, F355, and F2772, addressing different aspects of impact attenuation, force reduction, and indoor sports-floor performance.
Match the report to the proposed floor
A test sheet for a product family isn't enough if the proposed installation changes the construction. Follow this workflow:
- Define the activity and fall zone. Identify climbing equipment, jump-training areas, and surrounding landing space. Ordinary floor-level play and raised equipment require different evaluations.
- Request current third-party documentation. The report should cover the complete assembly, not just a turf sample or a pad sold separately.
- Compare every layer. Confirm the pad thickness, backing, seams, artificial turf infill, and concrete or subfloor match the tested construction.
Compression, moisture, temperature, and wear can change impact performance. Establish an inspection and reassessment plan rather than assuming an original rating remains valid indefinitely.
A decorative surface becomes a play-area specification only when the installed assembly has the documentation to support that use.
Get the test sheet in writing before accepting the floor for a play or athletic zone. If the proposed build doesn't match, resolve the discrepancy before installation, not after equipment is in place.
How to Lay Turf Over a Basement Concrete Slab
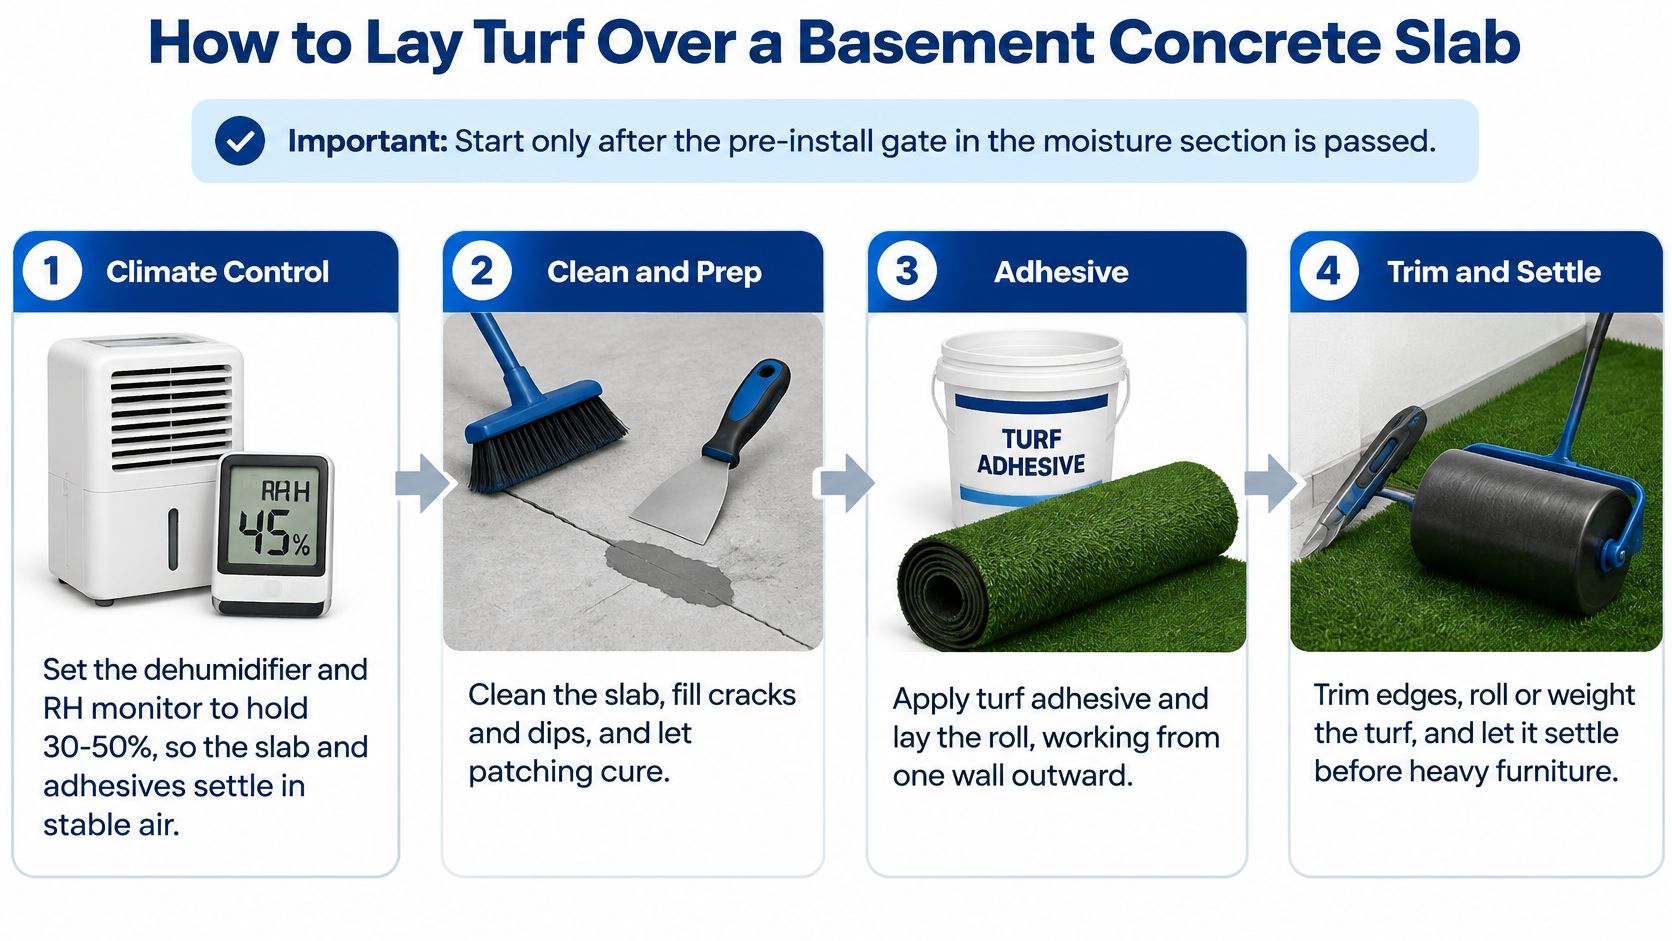
Begin only after the moisture assessment and safety specification are accepted. Installation can't compensate for an unsuitable substrate, and a generic adhesive method won't suit every backing, pad, or vapor-control layer.
This installation overview shows the broad sequence; the specified assembly determines the actual attachment method.
Prepare the substrate and supporting layers
Stabilize the room. Run the planned climate-control equipment and monitor conditions before installation. Keep materials and adhesive within their specified installation conditions rather than opening windows indiscriminately to dry the room.
Clean and repair the concrete. Remove dust, grease, loose coatings, and incompatible adhesive residue with appropriate mechanical preparation and a suitable vacuum. Check flatness with a straightedge, repair nonmoving defects with compatible patching compound, and investigate active cracks before covering them.
Install the specified vapor-control system. Follow the approved construction, including substrate preparation and perimeter details. Don't sandwich an improvised sheet between materials that need a bonded connection.
Fit the required shock pad. Lay it flat and secure its joints using the specified method so sections can't migrate. Keep its construction consistent with the accepted impact documentation, including any required seam treatment.
Fit and secure the turf
Unroll and relax the material. Let the turf acclimate flat in the room before final trimming. Orient adjoining pieces in the same pile direction so the finished floor doesn't show contrasting bands.
Dry-fit, cut, and join. Use a sharp utility knife and straightedge, cutting carefully from the backing where practical. Keep seam edges close without overlapping or trapping fibers, then use the compatible seam tape and adhesive.
Restrain exposed edges. Secure the perimeter and install suitable transitions at doorways and adjoining floors. Avoid fastening methods that puncture a moisture-control assembly unless that detail is explicitly approved.
Finish the fibers and any specified infill. Add infill only where the product and tested assembly call for it. Brush with equipment approved for the turf, since aggressive power brushing can damage some indoor products.
Preserve inspection access and check the finish. Keep the planned removable section accessible, and respect adhesive cure requirements before placing equipment. Check seams, bubbles, transitions, and fiber direction under room lighting.
A demonstration can help you recognize handling and trimming techniques, but it doesn't replace the written basement assembly specification.
Walk the completed floor before accepting it. An edge that catches a shoe or a seam that opens under normal movement needs correction, even if the room looks finished from the doorway.
Problems After Installation and How to Fix Them
A musty smell or damp patch calls for inspection beneath the turf, not fragrance on top. Lift an accessible section, check the backing and pad, and investigate the water source. Don't glue the section down again after the surface feels dry.
Use symptoms to narrow the repair, while remembering that an installer may need to open more of the assembly to confirm the cause.
Basement turf symptoms, causes and fixes
| Symptom | Likely cause | Fix |
|---|---|---|
| Musty smell or damp patches | Moisture trapped under turf or pad | Lift a section, identify the source, dry the slab, and restore controlled humidity |
| Seams lifting or wrinkling | Humidity movement or loose edges | Stabilize conditions, then re-tape seams and re-secure edges with compatible materials |
| Flattened or matted fibers | Heavy traffic without brushing | Brush with approved equipment and replenish infill only where specified |
| Odor in pet area | Urine reaching the backing, weak drainage | Use compatible enzyme cleaner, extract residue, and inspect drainage or collection paths |
| Bubbling or loose sections | Adhesive failure, potentially from a damp base | Verify substrate condition, remove failed adhesive as needed, and re-bond |
| Harder landing in play area | Compressed or worn shock pad | Close the affected zone, replace the pad, and arrange assembly reassessment or retesting |
Separate cleaning from construction repairs
Surface dirt and minor residue are maintenance issues. Follow a compatible artificial turf cleaning routine, using controlled amounts of water and extracting it where the assembly has no drain. Flood-rinsing an indoor pet area without a collection route can create another moisture problem.
Bond failures require more than cleaning. Re-bonding means exposing the base, correcting its condition, and allowing the repair materials to cure before use. Widespread bubbles or separating seams may indicate an assembly problem rather than an isolated loose spot.
Repair priority: Restore the floor's function before restoring its appearance.
A compressed pad shouldn't be assumed to retain its original protection. Keep play or impact training off the affected area until the replacement construction and required verification are complete.
Call the installer when moisture returns after drying, seams separate across the room, or the landing surface feels noticeably harder. Those aren't good candidates for repeated spot repairs.
Confirm Readiness and Budget Before You Order Basement Turf
Order when the floor is ready, not when the preferred turf goes on sale. The decision should rest on documented conditions and a defined use, with unresolved items treated as reasons to pause.
Make the purchase a pass-or-stop decision
Use these gates before authorizing materials:
- Moisture acceptance: The substrate test results satisfy the proposed system, and the humidity record shows controlled conditions.
- Use matched to construction: The surface supports the main activity, with separate provisions for lifting, golf strikes, or liquid collection where needed.
- Safety documentation accepted: Any play or training specification matches the actual proposed layers.
- Written installation plan complete: Base preparation, moisture control, seams, transitions, and inspection access are included.
Ask the installer how the slab was verified, which pad and test report support the intended activity, and how you'll inspect beneath the floor later. Written answers make competing quotes easier to compare and prevent a cheap turf allowance from hiding expensive preparation.
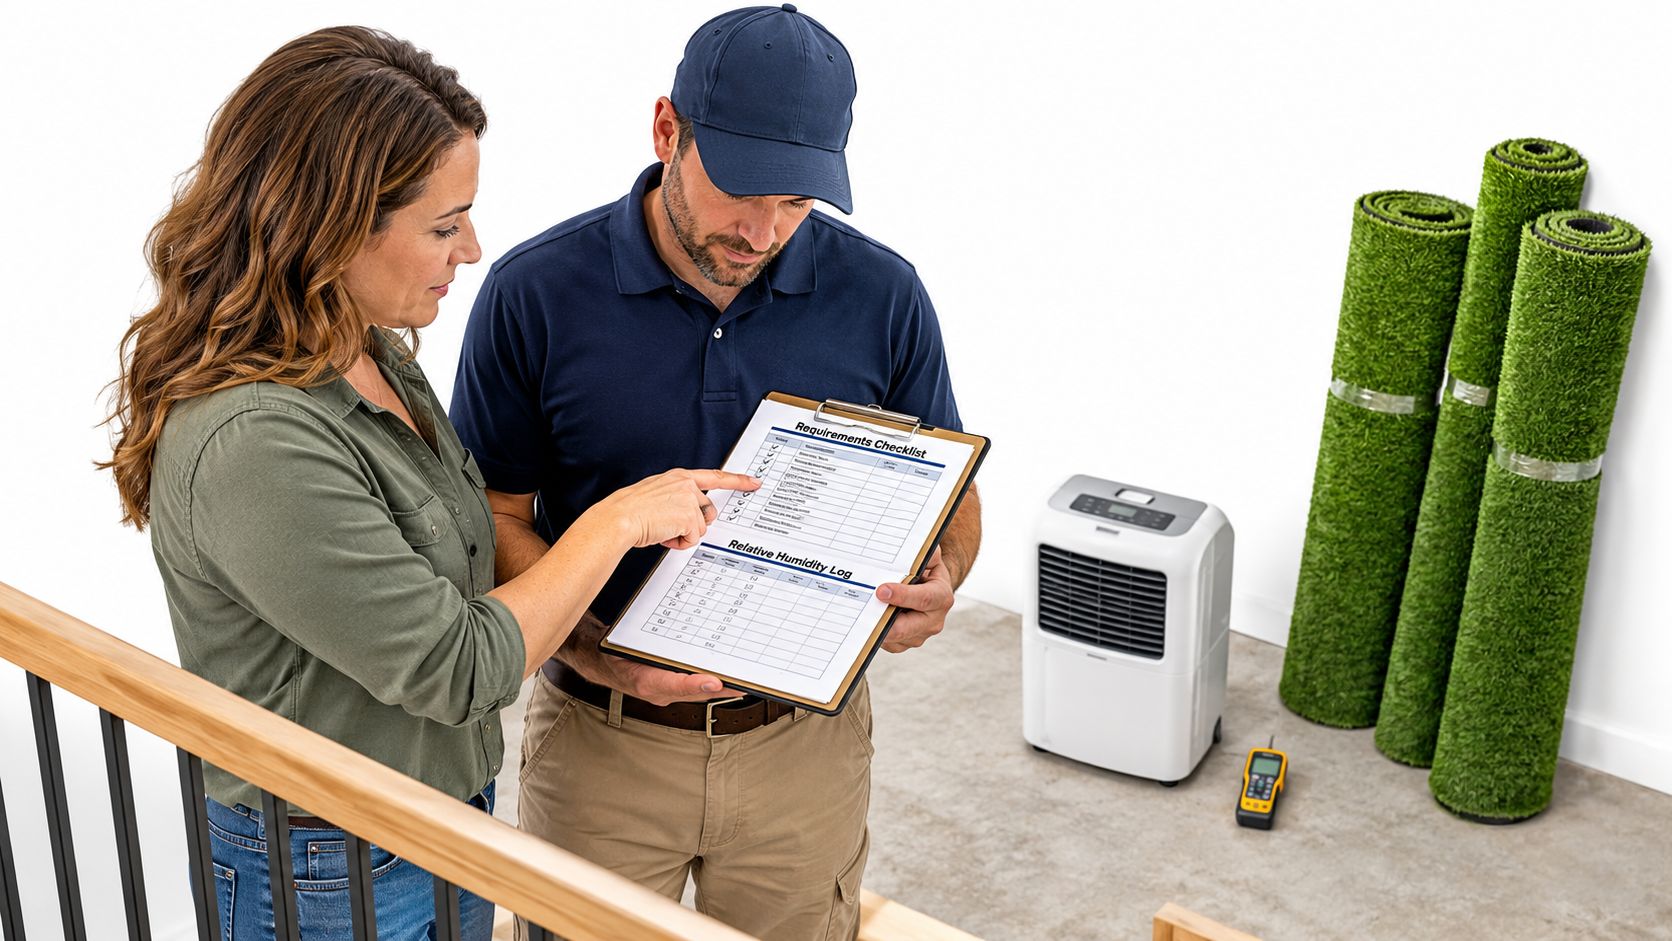
Bring the room's intended use and moisture records to the estimate discussion.
Budget for the floor system
Request itemized costs for slab preparation, moisture work, subfloor or vapor control, pad, turf, seams, infill, transitions, and installation. Also identify who pays for unexpected repairs revealed when existing flooring comes up.
For broader renovation context, HGTV's basement remodeling overview describes finished-basement projects ranging from $15,000 to $75,000, with an average near $32,000. Those figures describe whole basement conversions, not indoor turf, and shouldn't be used to estimate the turf portion or its resale return.
Our commercial turf can be installed on concrete and in indoor spaces, and our sports turf can be installed in indoor or outdoor facilities. That installation capability doesn't remove the need to approve an individual basement's slab and intended assembly.
This week, start a humidity log and book the slab assessment. Keep recording conditions through normal use and wet weather, then use the results to request a properly scoped quote rather than buying rolls first.
Waterloo Turf Indianapolis offers synthetic grass design and installation, including sports turf for indoor facilities and commercial turf for concrete surfaces. Visit Waterloo Turf Indianapolis to discuss your basement's intended use and request an estimate that addresses the base, moisture conditions, and appropriate turf system.